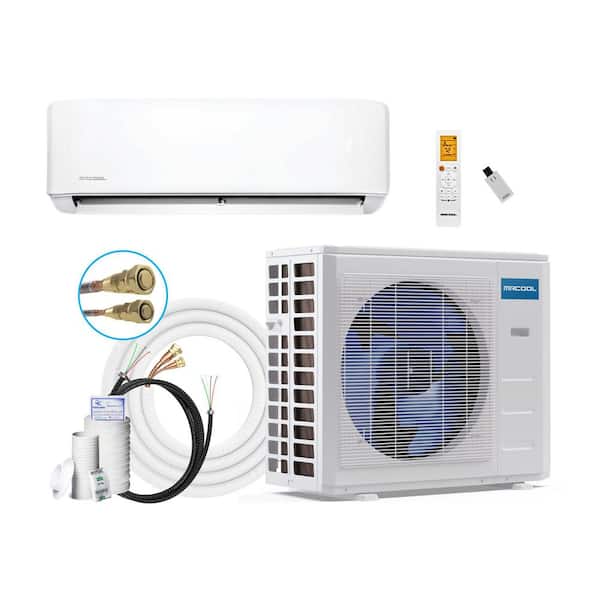
Finding the right climate control for a large garage, a newly finished basement, or an open-concept living area can be a challenge. The MrCool DIY 24,000 BTU Mini-Split Heat Pump is a high-capacity heating and cooling solution from MrCool designed specifically for homeowners who want a professional-grade HVAC result without the professional installation cost.
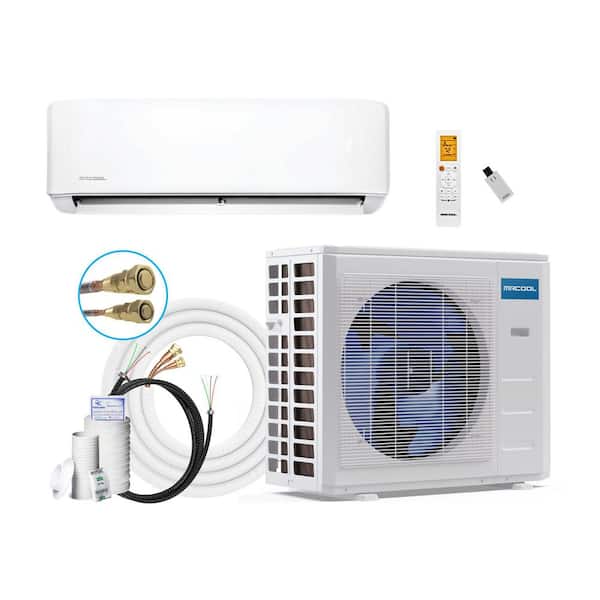
Top Pick: MrCool DIY 24000 BTU Ductless Mini-Split Heat Pump with Wi-Fi
Score: 9.1/10. A powerful DIY-friendly mini-split for larger spaces that combines year-round heating and cooling, Wi-Fi control, and installation savings for confident homeowners.
MrCool DIY 24000 BTU Ductless Mini-Split Heat Pump with Wi-Fi
The MrCool DIY 24000 BTU Ductless Mini-Split Heat Pump with Wi-Fi is a high-capacity, single-zone system designed for homeowners who want to avoid the high costs and scheduling headaches of a professional HVAC installation.
With a 24,000 BTU output, this unit is specifically engineered to handle larger spaces—typically up to 1,500 square feet—where central air is either non-existent or inefficient. This makes it an ideal candidate for finished garages, workshops, home additions, and expansive living rooms.
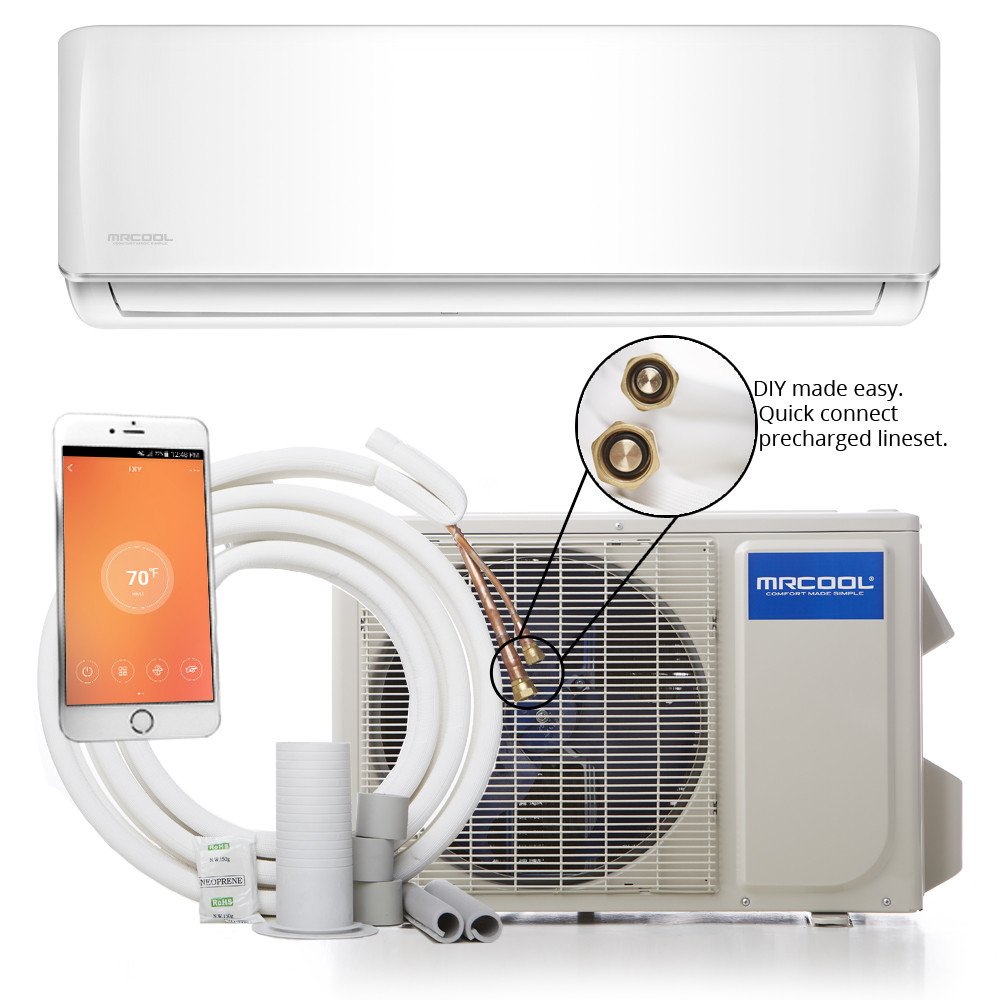
The standout feature of this model is the DIY-optimized design. Traditional mini-splits require a licensed technician to vacuum the lines and charge the refrigerant, a process involving expensive pumps and gauges. MrCool solves this by providing a pre-charged refrigerant line set with color-coded connections. For the experienced homeowner, this transforms a professional-only project into a manageable weekend task. While the installation still requires physical labor and electrical knowledge, the removal of the refrigerant-handling barrier is a significant value-add.
Beyond installation, the unit serves as a comprehensive heat pump. In the summer, it extracts heat from your indoor space and dumps it outside; in the winter, it reverses the process to provide warmth. The addition of Wi-Fi connectivity allows users to manage their climate via a smartphone app, providing a level of convenience and scheduling precision that surpasses the basic infrared remote. This is particularly useful for workshop or garage settings where you may want to pre-condition the space before you actually enter the room.
However, this unit is a specialized tool. It is not a "plug-and-play" window unit; it requires drilling through exterior walls and securing heavy equipment to your home's structure. It is designed for those who need a high-BTU solution for one large area. If you are looking to cool three small bedrooms, you may want to check out our guide on the best mini-splits for small rooms for a detailed breakdown of compact systems. Alternatively, you might consider a high-quality single-zone option like the Mitsubishi Ductless Mini-Split Heat Pump 15000 BTU Single Zone. For those needing smaller capacities, you might consider the Senville LETO Series 12,000 BTU Mini-Split Air Conditioner and Heat Pump, the Pioneer Diamante Series 18,000 BTU Mini-Split Heat Pump, or Bosch Ductless Mini-Split Heat Pump 18000 BTU Cold Climate Single Zone (see our Mitsubishi vs Senville vs LG comparison guide for system performance) for cold-climate performance. For this specific application—a singular, large-scale comfort project—the MrCool DIY 24000 BTU Ductless Mini-Split Heat Pump with Wi-Fi provides a compelling balance of power and accessibility.
Pros
- 24,000 BTU output suits larger single-zone spaces effectively.
- Provides both heating and cooling for consistent year-round comfort.
- DIY-focused design significantly reduces initial installation labor costs.
- Pre-charged line set eliminates the need for professional refrigerant charging.
- Wi-Fi controls allow for remote scheduling and temperature adjustments.
- Perfect for non-ducted spaces like garages and home additions.
Cons
- Requires significant manual labor (wall drilling, mounting, drainage).
- Oversized for small rooms, which can lead to short-cycling and poor humidity control.
- Limited to a single zone; cannot condition separate rooms independently.
- Performance fluctuates based on local climate and home insulation.
- Electrical requirements may still necessitate a licensed electrician.
This guide is written to help compare product fit and features. When you buy through qualifying affiliate links on this page, we may earn a commission at no extra cost to you.
| Specification | Details |
|---|---|
| Model Number | DIY-24-HP-WIF115 |
| System Type | Single-zone ductless mini-split heat pump |
| Cooling/Heating Capacity | 24,000 BTU |
| Coverage Area | Up to ~1,500 sq. ft. |
| Installation Method | DIY Pre-charged Line Set |
| Connectivity | Wi-Fi Enabled / Smart App Control |
| Primary Use Cases | Garages, workshops, additions, open living areas |
How Mini-Split Heat Pumps Work: The Science of Heat Exchange
Unlike a traditional furnace or window air conditioner, a ductless mini-split heat pump doesn't "create" heat or cold in the traditional sense; instead, it moves heat from one place to another. This is based on the principles of thermodynamics, specifically the ability of a refrigerant to absorb and release heat as it changes states between liquid and gas.
The system consists of two main components: the indoor air handler and the outdoor condenser unit, connected by a refrigerant-carrying line set. If you are deciding between brands for a smaller room, see our Mitsubishi vs Senville vs LG comparison. For those exploring different capacities, our Pioneer Diamante Series 18,000 BTU Mini-Split Heat Pump Buying Guide (featuring the Pioneer Diamante Series 18,000 BTU Mini-Split Heat Pump) offers a great comparison for medium-sized rooms. The "magic" happens via a compressor and a reversing valve, which allow the system to switch directions depending on the season.
The Cooling Cycle (Summer Mode)
In Cooling Mode, the indoor unit's evaporator coil becomes very cold. A fan blows warm indoor air over these coils; the refrigerant inside absorbs the heat from the air, causing the refrigerant to evaporate into a gas. This cooled air is then pushed back into the room. The gas then travels through the copper lines to the outdoor condenser, where the heat is released into the outside atmosphere, and the refrigerant is compressed back into a liquid to start the cycle again.
The Heating Cycle (Winter Mode)
In Heating Mode, the reversing valve flips the flow. The outdoor unit now acts as the evaporator, extracting heat from the outdoor air. Even when it feels cold to a human, there is still thermal energy in the air that the refrigerant can absorb. This heat is then transported indoors and released through the air handler, warming the room. Because this process moves heat rather than creating it through electrical resistance (like a space heater), it is exponentially more energy-efficient.
Comprehensive DIY Installation Guide
The "DIY" aspect of the MrCool system is a game-changer, but it is not without effort. If you are performing a broader HVAC overhaul, you may also want to browse our comprehensive guide to the best furnace control boards to ensure your entire system is modernized.
To ensure your warranty remains intact and your system operates efficiently, the installation must be handled with precision. A mini-split is a permanent home modification, and mistakes during setup can lead to refrigerant leaks or water damage.If you're upgrading your home's overall infrastructure, you might also consider a SimpliSafe security system to match your self-reliance approach.
Phase 1: Site Selection and Planning
Before drilling any holes, you must determine the optimal placement for both units. The indoor air handler should be mounted on a wall with plenty of clearance for airflow—avoid placing it behind furniture or in a cramped corner. Ideally, the unit should be centered in the room to ensure even distribution of air. If the room has high ceilings, mounting the unit higher up helps since heat rises and cold air sinks.
The outdoor condenser needs a level, stable surface. While some users mount them on wall brackets, a concrete pad or a heavy-duty plastic riser is recommended to prevent the unit from sinking into the soil or vibrating against the house. Ensure the unit is placed away from direct obstructions (like thick shrubs or fences) to allow the fan to exhaust hot air effectively.
Phase 2: The Wall Penetration
You will need to drill a hole (typically 3 inches in diameter) through your exterior wall to allow the line set, communication wires, and condensate drain to pass through. If you are upgrading your wall insulation during this process, ensure you have a stable power source; if you are updating your panel, check our guide on AFCI vs Standard Circuit Breakers and our list of best 20-amp circuit breakers for home electrical panels and learn how to replace a circuit breaker safely at home. This is the most intimidating part for many DIYers. It is vital to drill this hole at a slight downward angle toward the outside. This ensures that condensation from the indoor unit flows naturally outward via gravity, preventing water leaks inside your walls which can lead to mold and structural rot.
Phase 3: Routing and Protecting the Line Set
The line set is the "circulatory system" of the unit. The MrCool DIY system comes pre-charged, meaning the refrigerant is already inside the lines. You must route these lines carefully, avoiding sharp kinks or bends. If you bend the copper too sharply, you can restrict the flow of refrigerant, which puts immense strain on the compressor and will likely lead to a system failure.
Most professional-looking DIY installations use "line set covers" (also known as Slimduct or conduits). These plastic channels protect the pipes from UV degradation and prevent animals from chewing on the insulation, while also providing a clean, finished look to the exterior of your home.
Phase 4: Connecting the Lines (The Critical Step)
MrCool uses color-coded flare connections to simplify the process. However, "simple" does not mean "casual." You must ensure these connections are tightened to the exact manufacturer specifications. We strongly recommend using a torque wrench rather than just a standard adjustable wrench. A loose connection can lead to a slow refrigerant leak that may take months to notice but will eventually kill the unit's cooling capacity. Conversely, over-tightening can crack the flare, causing an immediate and catastrophic leak.
Advanced Maintenance and Long-Term Longevity
A mini-split is a significant financial investment. To ensure it lasts a decade or more, you cannot simply "set it and forget it." Because these systems move a massive volume of air, they act as giant filters for your home, collecting everything from dust to cooking grease.
Bi-Weekly Filter Cleaning
The indoor unit has removable mesh filters. Over time, these collect dust, pet hair, and pollen. When filters are clogged, the airflow is restricted, forcing the blower motor to work harder and the heat exchange to become less efficient. This increases your electricity bills and puts unnecessary stress on the compressor. Slide the filters out, rinse them with lukewarm water, let them dry completely, and slide them back in. For those looking to improve overall home air quality, we recommend using high-quality MERV-rated filters—like those found in our Filtrete air filter review—to maintain indoor air quality. If you are dealing with excessive moisture in a basement before installing a mini-split, you might also consider an IPX4 ventilation fan or a Ridgid SP-650C sump pump guide or the Wayne ESP25 battery backup review to manage humidity and water intrusion.
Seasonal Condensate Drain Check
In cooling mode, the unit removes moisture from the air. This water collects in a tray and flows out through a plastic drain line. Over time, algae, dust, or insects can clog this line. If the drain is blocked, the water has nowhere to go but backward, leaking directly down your interior wall. Once a season, ensure the exit point of the drain is clear and that water is flowing freely when the unit is running.
Annual Outdoor Unit Cleaning
The outdoor condenser uses a series of aluminum fins to dissipate heat. Leaves, grass clippings, and dirt can clog these fins, insulating the coils and making the unit work harder to dump heat. Use a soft-bristled brush or a low-pressure garden hose to gently clean the debris from the fins. Avoid using a power washer, as the high pressure can bend the aluminum fins, permanently restricting airflow and reducing system efficiency.
Buyer's Guide: Is the 24,000 BTU Model Right for You?
Choosing the correct BTU (British Thermal Unit) capacity is the most critical decision in the mini-split buying process. Under-sizing a unit means your space will never reach the target temperature during extreme weather, causing the system to run constantly and wear out prematurely. Over-sizing a unit leads to "short-cycling," where the unit reaches the temperature so quickly that it shuts off before it can effectively remove humidity from the air, leaving the room feeling cold but clammy.
Sizing Your Space (For smaller zones, consider the Daikin 17 SEER Single-Zone Ductless Mini-Split Heat Pump 12000 BTU with WiFi)
The MrCool DIY 24,000 BTU model is generally rated for spaces up to 1,500 square feet.