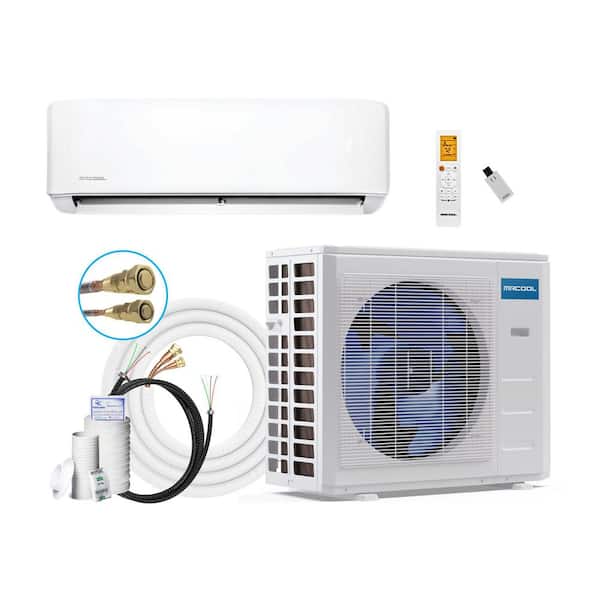
MrCool DIY 24000 BTU Ductless Mini-Split Heat Pump with Wi-Fi: 8.7/10
The MrCool DIY 24000 BTU Ductless Mini-Split Heat Pump with Wi-Fi is a high-efficiency HVAC solution that genuinely lives up to its "do it yourself" promise, delivering whisper-quiet year-round heating and cooling for spaces up to 1,500 square feet without the need for a professional contractor.
We may earn a commission from purchases made through links on this page, at no extra cost to you.
Overview
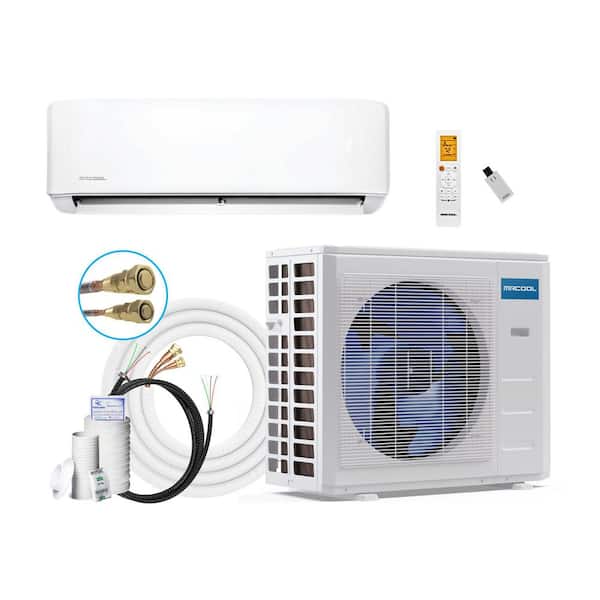
The MrCool DIY 24000 BTU Ductless Mini-Split Heat Pump with Wi-Fi (model DIY-24-HP-WIF115) is a two-ton ductless system designed around one core idea: that a reasonably handy homeowner should be able to install a real heat pump without hiring an HVAC contractor. The system ships with a pre-charged refrigerant line set and color-coded connections, which eliminates the vacuum pumps, gauges, and refrigerant handling that normally make mini-split installation a licensed-professional job.
At 24,000 BTU, this unit is sized for spaces up to roughly 1,500 square feet, which puts it squarely in garage-conversion, home-addition, and open-plan living territory (check our MrCool DIY-24-HP-WIF115 Mini-Split Buying Guide for precise BTU calculations). Because it is a heat pump rather than a cooling-only unit, it handles both summer and winter duty from a single wall-mounted air handler, with Wi-Fi smart controls letting you manage temperature from your phone whether you are home or away.
Who is it for? Confident DIYers who want to climate-control a large room, workshop, garage, or addition on a budget—and who would rather spend a weekend installing than spend four figures on labor. If you prefer a contractor-installed system, a unit like the Mitsubishi Ductless Mini-Split Heat Pump 15000 BTU Single Zone may suit you better (see our MrCool DIY-24-HP-WIF115 mini-split buying guide for more sizing tips); and if you want a fully invisible ducted system or you are uncomfortable drilling a hole through an exterior wall, this is not the product for you. For everyone else, it is one of the most accessible paths to efficient zoned comfort on the market.
Key Features
Pre-charged refrigerant lines and color-coded connections mean no vacuum pump, no gauges, and no HVAC technician required.
Two tons of heating and cooling power, suitable for open spaces up to about 1,500 square feet.
Both heating and cooling modes from one unit, keeping garages, additions, and living areas comfortable year-round.
Adjust temperature, modes, and schedules from your phone—handy for pre-warming a workshop before you head out.
The indoor air handler runs quietly enough for bedrooms and living spaces, not just utility areas.
No ductwork losses—conditioned air is delivered directly into the space you actually occupy.
| Feature | Value |
|---|---|
| Model | DIY-24-HP-WIF115 |
| Type | Ductless mini-split heat pump |
| Capacity | 24,000 BTU (2 tons) |
| Coverage | Up to 1,500 sq ft |
| Modes | Heating and cooling |
| Installation | DIY — pre-charged line set, color-coded connections |
| Smart controls | Wi-Fi enabled app control |
| Noise level | Quiet operation suitable for living spaces |
| Best for | Garages, additions, open-plan living areas |
Pros & Cons
Pros
- Genuine DIY installation saves significant labor costs
- Heats and cools — true year-round solution
- Wi-Fi controls add real day-to-day convenience
- Quiet enough for living areas, not just garages
- Pre-charged line set removes the riskiest part of mini-split installs
- Strong 1,500 sq ft coverage from a single zone
Cons
- Installation still requires drilling through an exterior wall and basic electrical work
- Wall-mounted air handler is visible in the room
- Single-zone only — multi-room homes may need additional units
- Heavier components benefit from a second pair of hands during mounting
Performance
In day-to-day use, the MrCool DIY 24000 BTU mini-split behaves like the professionally installed mini-splits it competes with. Cooling a large open-plan space is where the 24,000 BTU rating shines: the unit pulls a warm room down to target temperature quickly and then settles into a quiet, steady hum that fades into the background. In heating mode, it keeps garages and additions comfortable through the colder months, making it a legitimate primary heat source for the spaces it is sized for.
The installation experience deserves its own mention, because it is the headline feature. The color-coded connections and pre-charged line set work as advertised—most handy homeowners can complete the job in a weekend with common tools. The hardest parts are physical rather than technical: drilling the wall penetration cleanly and lifting the outdoor unit into place. Plan for a helper and the process is straightforward.
Before mounting the indoor air handler, confirm the line set routing path to the outdoor unit. A few minutes of planning here prevents awkward bends in the pre-charged lines, which should never be kinked or cut.
The Wi-Fi controls are more than a gimmick. Being able to start warming a detached garage from the kitchen, or schedule cooling for an addition before guests arrive, is the kind of convenience that quickly becomes habit. App control also makes it easy to monitor the unit when used in a space you do not occupy daily.
Deep Dive: How the DIY Technology Works
To understand why the MrCool DIY 24000 BTU Ductless Mini-Split Heat Pump with Wi-Fi is unique, one must understand the "traditional" mini-split installation process. Normally, a technician must mount the indoor and outdoor units, run copper refrigerant lines, and then perform a "vacuum pull." This involves using a vacuum pump to remove all air and moisture from the lines before releasing the refrigerant from the outdoor unit. If moisture remains, it can contaminate the system and cause premature compressor failure.
MrCool has solved this by using "Quick-Connect" technology. The refrigerant is pre-charged into the line sets themselves, and the connection points are sealed with high-pressure valves. When you connect the lines to the outdoor condenser, the seal is mechanical and airtight, meaning the "vacuum" step is effectively bypassed by the factory. The color-coded system ensures that the liquid line and suction line aren't swapped, which would otherwise cause the system to fail instantly.
This engineering shift moves the risk from the field to the factory. While professionals may argue that a field-vacuumed system is "cleaner," the tolerances in the MrCool DIY system are tight enough that for 99% of residential applications, the performance difference is negligible compared to the massive cost savings of avoiding a professional HVAC contract.
Detailed Installation Walkthrough
While the system is labeled "DIY," it is not "plug-and-play" in the way a toaster is. It is a mechanical installation that requires precision. For those planning to tackle the DIY-24-HP-WIF115, the process generally follows these critical phases:
1. Site Selection and Mounting
The indoor air handler must be mounted on a wall with enough clearance for airflow. You cannot place it too close to a ceiling or in a tight corner, or you will create "dead zones" of air. The outdoor condenser requires a level concrete pad or the included wall bracket. It is vital that the outdoor unit has at least 12-24 inches of breathing room around it to exhaust heat efficiently; otherwise, the unit will work harder, consume more power, and wear out faster.
2. The Wall Penetration
This is the most intimidating part for new DIYers. You must drill a 3-inch hole through your exterior wall at a slight downward angle. The downward slope is critical: it ensures that any condensation from the indoor unit drains naturally via gravity to the outside. If you drill the hole level or upward, water will leak back into your wall, leading to mold or structural rot.
3. Connecting the Line Sets
Once the indoor unit is mounted and the hole is drilled, the pre-charged lines are fed through. The "magic" happens at the outdoor unit. You align the color-coded nuts and tighten them. MrCool provides specific torque requirements; over-tightening can crush the seal, while under-tightening causes leaks. Using a torque wrench is highly recommended for this specific step.
4. Electrical Integration
The DIY-24-HP-WIF115 requires a dedicated electrical circuit. Depending on your local code and the specific voltage of your home, you may need to install a disconnect box outside near the condenser. If you are not comfortable with high-voltage electrical work, this is the one part of the "DIY" process where hiring a licensed electrician for two hours of work is a smart and safe move. This is also a good time to ensure your panel is up to code with modern safety devices like an AFCI breaker.
Maintenance Guide for Long-Term Reliability
Mini-splits are generally lower maintenance than central air, but they are not "set and forget." Because the indoor unit is the only point of air filtration, the filters can clog quickly, especially in garages or workshops with sawdust and debris.
Filter Cleaning (Every 2-4 Weeks)
The air handler has removable plastic mesh filters. These should be popped out and rinsed with lukewarm water and mild soap. For those looking to improve overall home air quality beyond the mini-split, check out our Filtrete MERV-12 filter review. If you allow these to clog, the unit will struggle to pull air, which increases the load on the compressor and significantly reduces the energy efficiency of the system.
Condensate Line Inspection (Seasonally)
The drain line carries water from the indoor unit to the outside. Algae and dust can build up in this line, creating a "slug" that blocks water flow. If this happens, water will overflow from the indoor unit and run down your interior wall. It is recommended to blow out the line or use a specialized vacuum to ensure it is clear before the start of the cooling season.
Outdoor Unit Care (Bi-Annually)
The outdoor condenser coils can become clogged with leaves, grass clippings, or spider webs. Use a garden hose (on a low-pressure setting) to gently rinse the coils. Never use a pressure washer, as this can bend the delicate aluminum fins, permanently restricting airflow and voiding your warranty.
Sizing and Buyer's Guide: Is 24,000 BTU Right for You?
Choosing the wrong BTU rating is the most common mistake in mini-split installations. If you undersize, the unit runs constantly without ever reaching the target temperature, wasting energy and wearing out the compressor. If you oversize, the unit "short-cycles"—it reaches the target temperature so quickly that it shuts off before it has a chance to properly dehumidify the air, leaving the room feeling cold but clammy.
The 24,000 BTU capacity of the DIY-24-HP-WIF115 is designed for spaces up to 1,500 square feet, but that is a general guideline. To determine if this specific model fits your needs, we recommend reviewing our MrCool DIY-24-HP-WIF115 Mini-Split Buying Guide. Consider these variables:
- Ceiling Height: If you have vaulted ceilings or 12-foot walls, you have more cubic volume to heat and cool than a standard room. In these cases, 1,500 square feet might actually require 28,000 or 30,000 BTUs.
- Insulation Quality: A well-insulated, modern addition will be easy to manage. An uninsulated 1950s garage with single-pane windows will lose heat and cool air rapidly, meaning the 24,000 BTU unit will have to work much harder.
- Heat Loads: Do you have a large server rack in your office? A high-end woodworking tool in your shop? These generate internal heat that the mini-split must counteract.
- Climate Extremes: If you live in an area where winter temperatures regularly drop below freezing, remember that while this is a heat pump, efficiency drops as the outside air gets colder. You may need supplemental heat for the absolute coldest days of the year.
A good rule of thumb for DIYers: If your space is exactly 1,500 square feet but poorly insulated, move up to a multi-zone system or add a secondary smaller unit. It is better to have a bit of extra capacity than to struggle during a heatwave.
Comparative Analysis: DIY-24-HP-WIF115 vs. The Market
To determine the true value of the MrCool DIY 24000 BTU Ductless Mini-Split Heat Pump with Wi-Fi, we have to compare it against three common alternatives: window units, portable ACs, and professionally installed mini-splits.
Vs. Window Units and LG Dual Inverter Portable Heat Pump 14000 BTU
While a window unit is cheaper upfront, the 24,000 BTU MrCool system is vastly superior in three areas: Noise, Efficiency, and Aesthetics. Window units leak air around the frame and are loud. Portable units vent air through a hose that often leaks heat back into the room. The MrCool system is nearly silent and maintains a tight building envelope, leading to lower monthly electricity bills.
Alternative: If you only need to cool a small bedroom, the Carrier Performance Series Ductless Mini-Split Heat Pump 9000 BTU Single Zone is an excellent compact alternative.
For those seeking a budget-friendly alternative, the Senville LETO Series 12,000 BTU Mini-Split Air Conditioner and Heat Pump is a great option. For those comparing different capacities, our Pioneer WYS018GMFI22RL Mini-Split Heat Pump Buying Guide for the Pioneer Diamante Series 18,000 BTU Mini-Split Heat Pump offers a great perspective on mid-sized units. Furthermore, the heating capacity of a heat pump far exceeds that of a window AC with a basic "heat strip."Vs. Traditional Professional Mini-Splits
A professional install of a 2-ton system often costs between $2,000 and $5,000 in labor alone. By eliminating this, the DIY-24-HP-WIF115 allows you to put that money back into the equipment itself. While high-end brands like the Mitsubishi Ductless Mini-Split Heat Pump 15000 BTU Single Zone or the Bosch Ductless Mini-Split Heat Pump 18000 BTU Cold Climate Single Zone (detailed in our Bosch buying guide) or the Daikin 17 SEER Single-Zone Ductless Mini-Split Heat Pump 12000 BTU with WiFi (detailed in our Daikin buying guide) may offer slightly higher SEER ratings (efficiency), the "payback period" for that extra efficiency is often 10+ years. For most homeowners, saving $3,000 on day one is a better financial move than saving $15 a month on electricity over a decade.
The "DIY Risk" Premium
The only "cost" associated with this unit is the risk of improper installation. If you kink a line or fail to seal a connection, the refrigerant will leak. However, MrCool provides extensive video tutorials and a clear manual, which mitigates this risk for anyone who can f