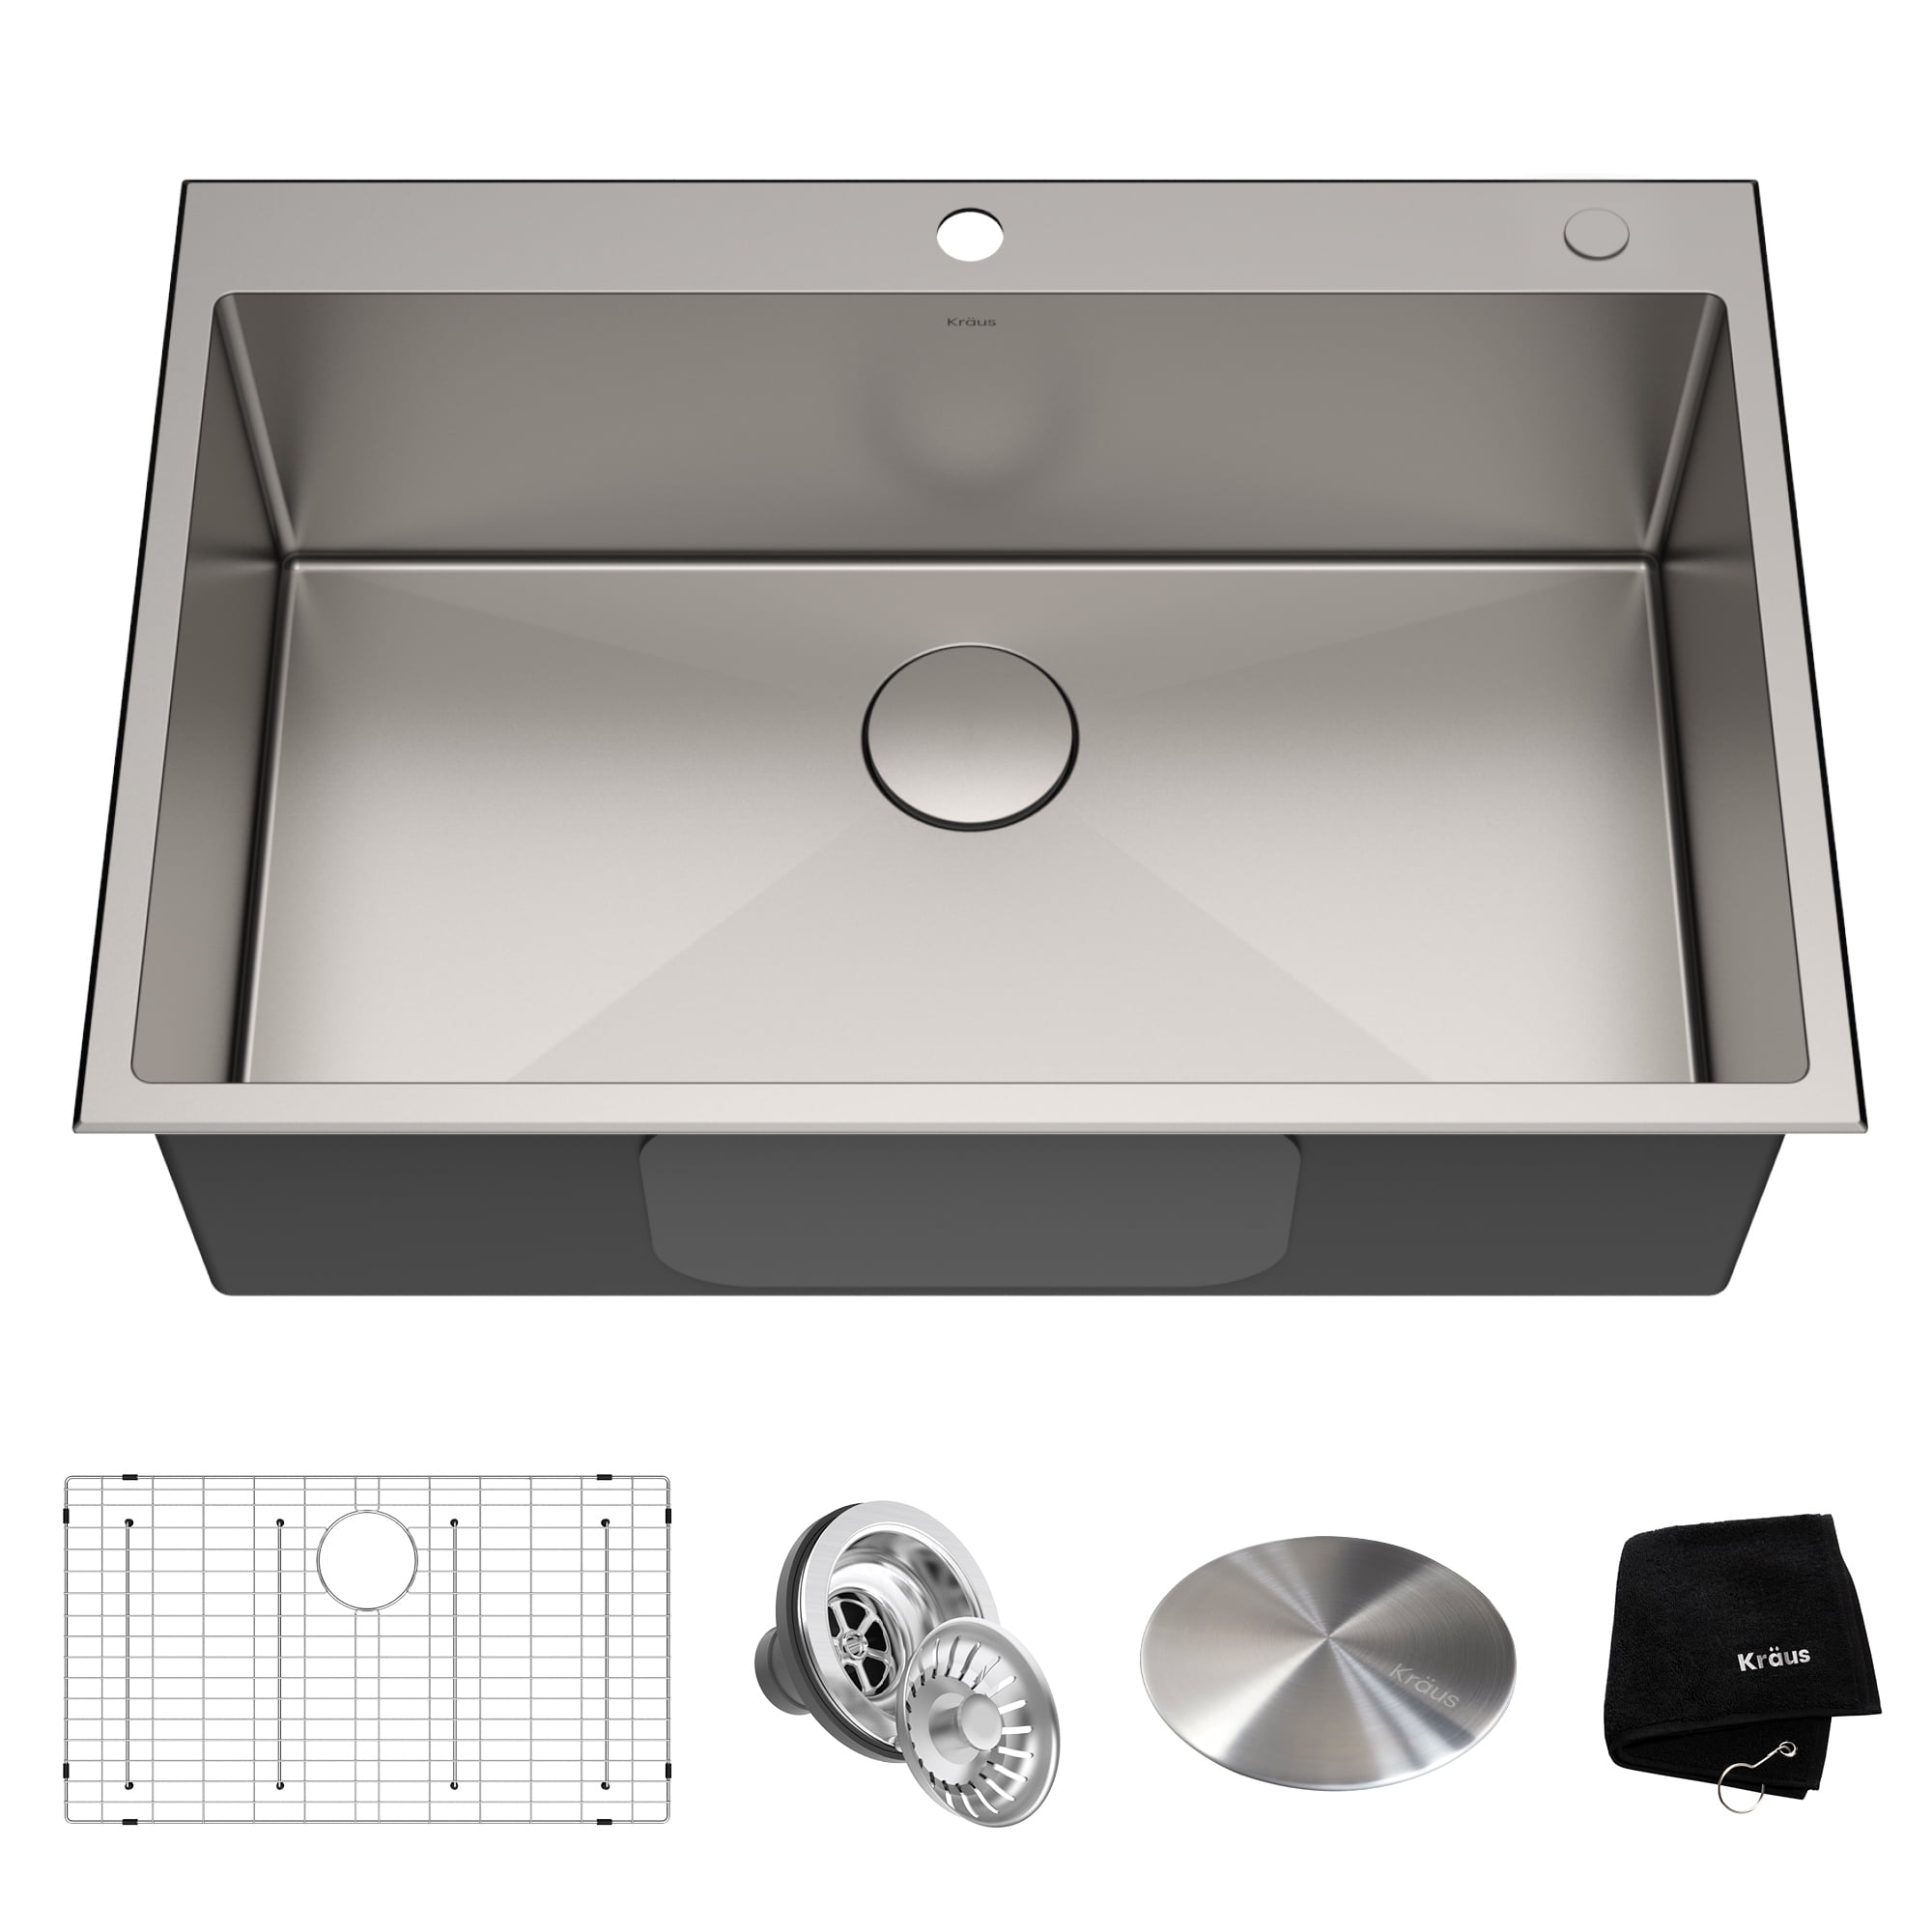
Kraus Standart PRO KHU100-33 — 8.5/10
The Kraus Standart PRO KHU100-33 hits the sweet spot of build quality, capacity, and value. The 16-gauge construction is the real deal, the included accessories make it ready to use out of the box, and the deep single bowl transforms the way you work in the kitchen. For most homeowners shopping for an undermount sink in this size class, it's the one to beat.
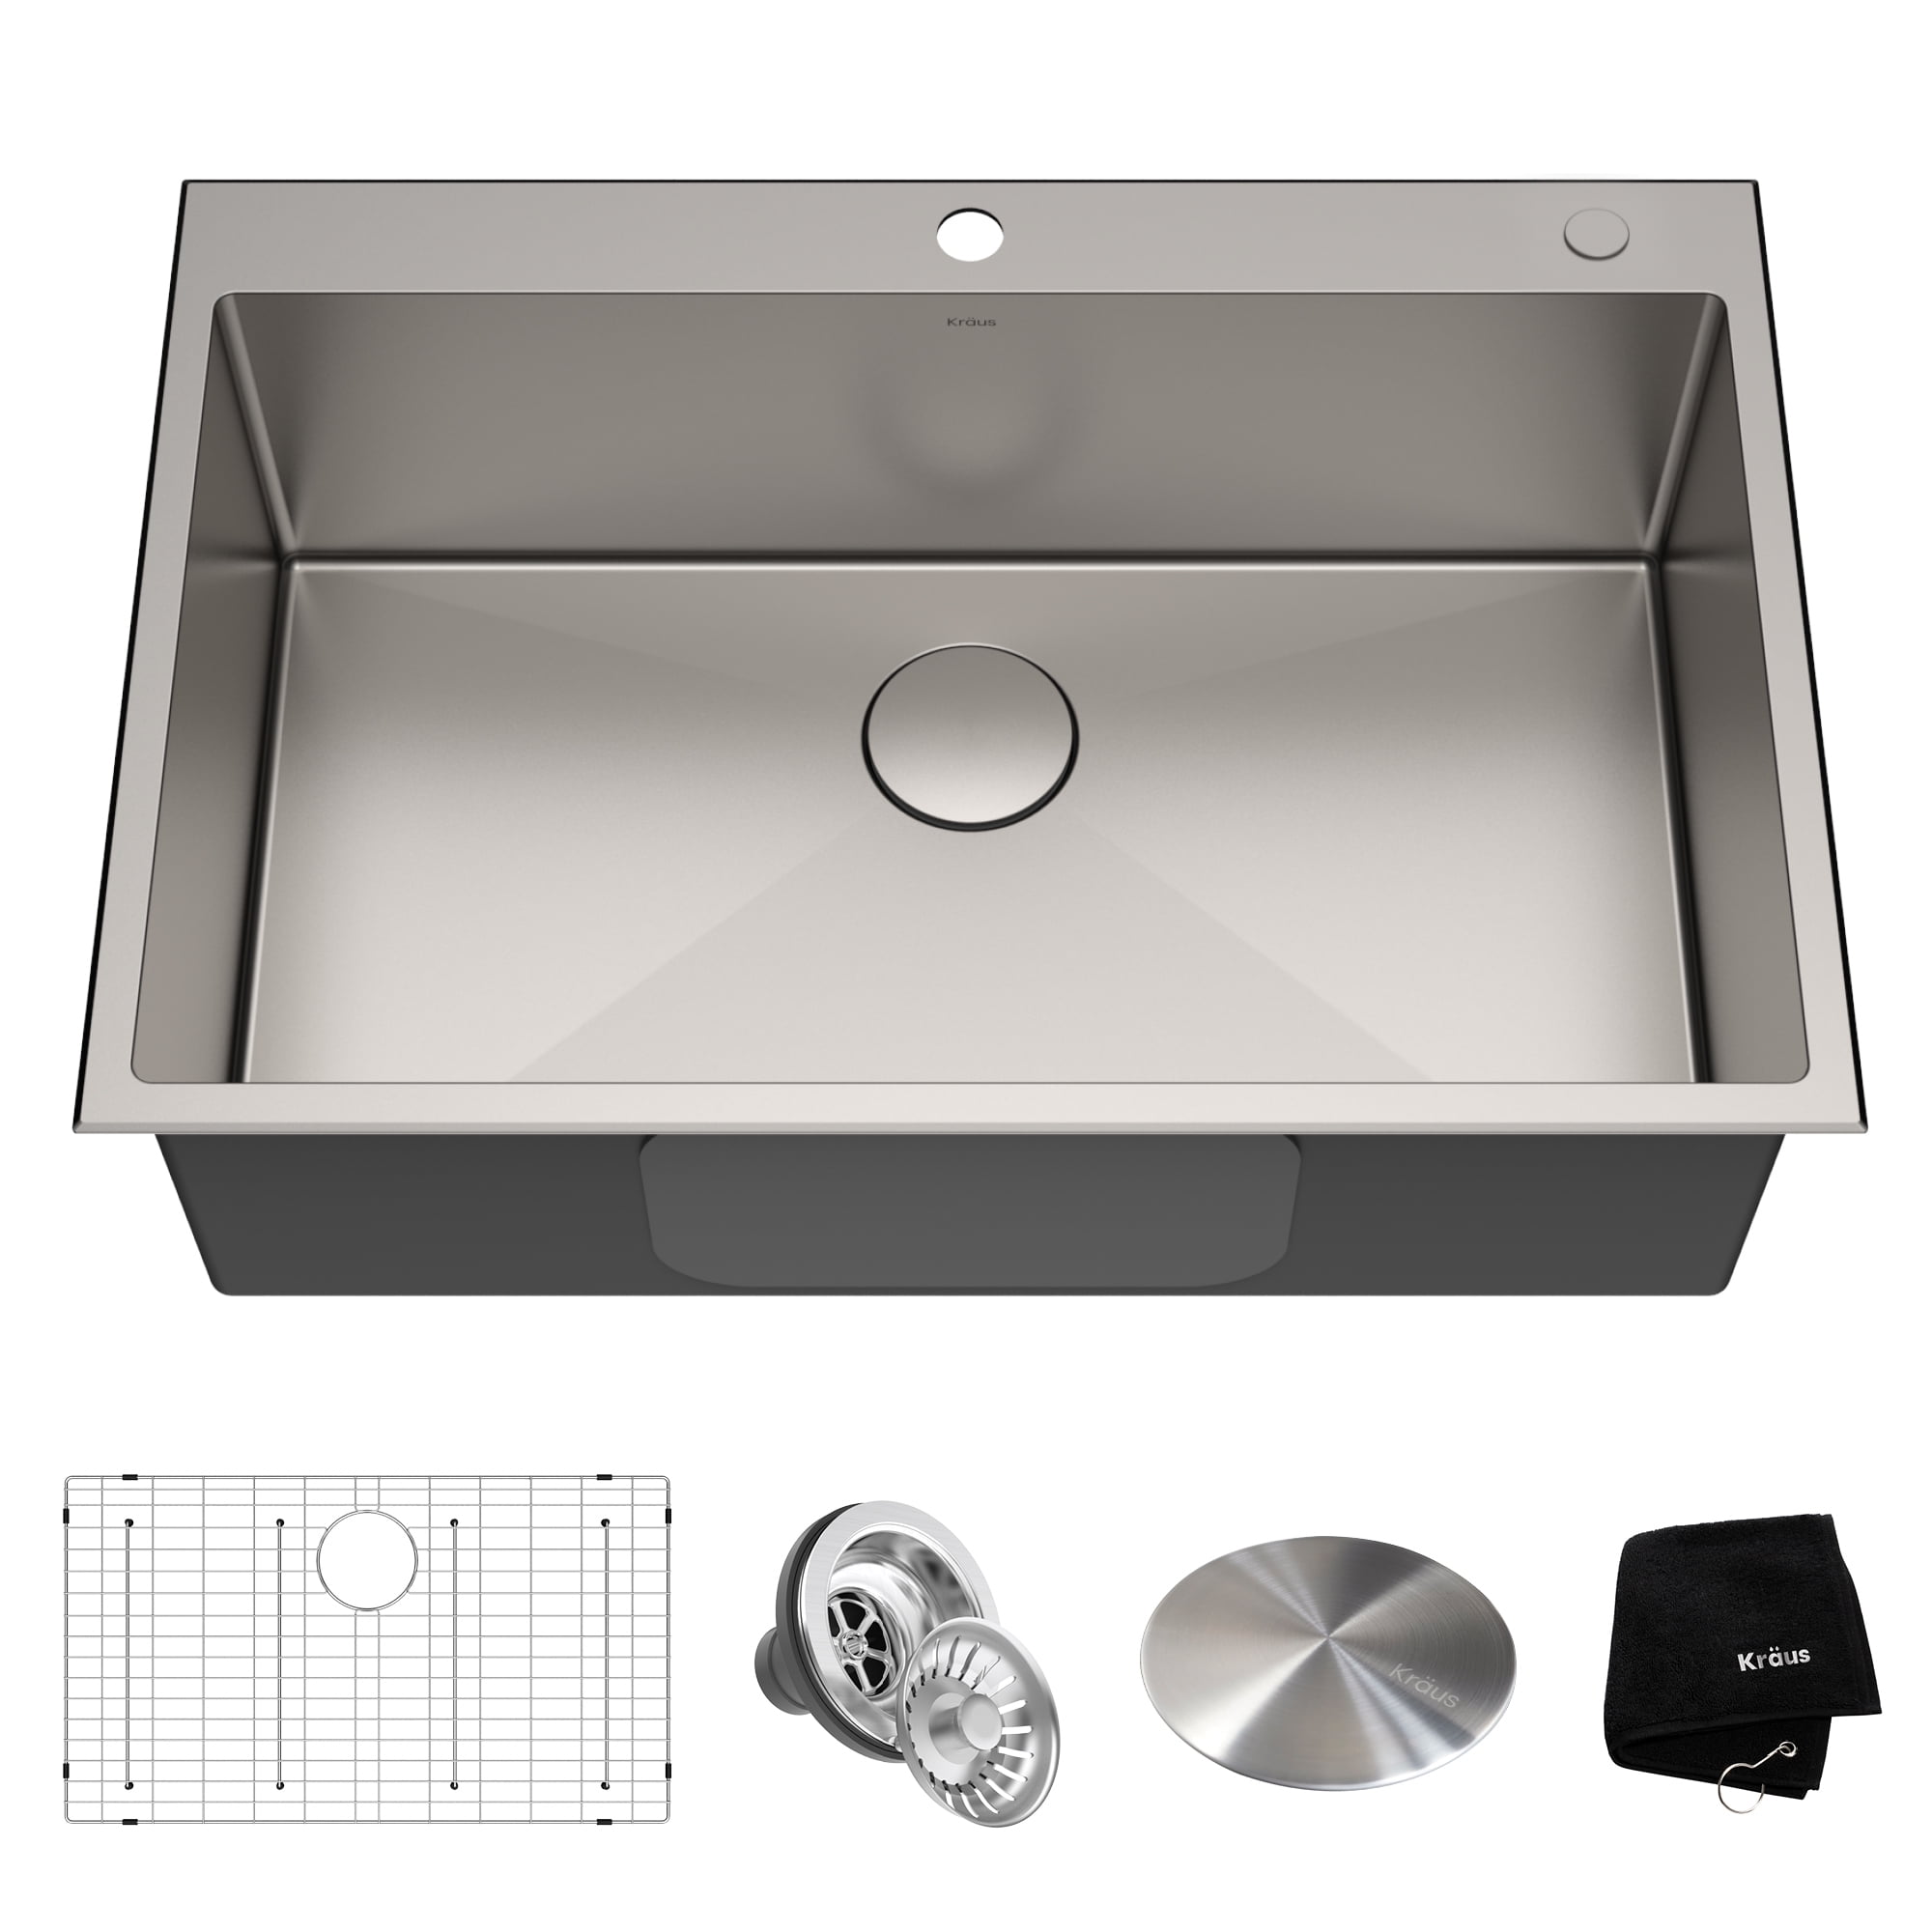
The Kraus Standart PRO is our top recommendation for those seeking commercial-grade durability without the luxury price tag.
Overview
The Kraus Standart PRO effectively lowers the barrier to entry for professional-grade kitchen setups, delivering a commercial-grade experience at a residential price point.
The Kraus Standart PRO 33-inch 16 Gauge Undermount Single Bowl Stainless Steel Kitchen Sink (yes, "Standart" is the official spelling Kraus uses) has earned its reputation as one of the most popular undermount kitchen sinks on the market, and after spending considerable time with it, it's easy to see why. This 33-inch single bowl workhorse blends commercial-grade construction with a price that doesn't scream luxury, making it a go-to choice for kitchen renovations and new builds alike—typically landing in the $300–$400 range depending on retailer and promotions.
At its core, the KHU100-33 is a 16-gauge T-304 stainless steel undermount sink with a 10-inch deep single bowl, measuring 32.75 inches long by 19 inches wide overall. It requires a minimum 36-inch base cabinet and uses a standard 3.5-inch drain opening compatible with virtually all garbage disposals and basket strainers. The package includes a custom-fit bottom grid, basket strainer drain assembly, mounting hardware, and a microfiber cleaning cloth—a bundle that would cost $80–$120 separately.
What separates this sink from the pack isn't any single feature but the combination: genuine 16-gauge thickness (not "16-gauge equivalent" marketing speak), comprehensive sound dampening covering over 80% of the underside, a sloped basin floor that actually drains completely, and a warranty backed by a company that's been in the kitchen fixture business for over a decade. It's a sink built for people who cook seriously and want equipment that keeps up.
Key Features
True 16-gauge thickness (approximately 1.6mm / 0.0625 inches) provides exceptional dent resistance, minimal flex, and a substantial 30-pound weight that signals quality immediately upon unboxing.
Multi-layer system combining thick rubber undercoating on over 80% of the basin underside with dense sound-absorbing pads. Reduces dish-clatter and running-water noise to a muted thud.
Generous depth contains splashing, accommodates oversized stockpots, sheet pans, and even large poultry. Single-bowl design eliminates the divider that limits what fits in double-bowl sinks.
Precision-engineered channels funnel water toward the off-center rear drain. Eliminates standing water, pushes debris toward the strainer, and maximizes under-sink cabinet space.
Tight 10mm corner radius with directional grain that hides water spots, fingerprints, and minor scratches. Blends cosmetic wear into the existing pattern over time.
Includes custom-fit bottom grid with rubberized feet, basket strainer drain assembly, undermount mounting clips and hardware, and microfiber cleaning cloth—ready to install out of the box.
Universal compatibility with all major garbage disposal brands (InSinkErator, Waste King, Moen, etc.) and aftermarket basket strainers. No proprietary parts to hunt down later.
Kraus backs the Standart PRO with a limited lifetime warranty covering manufacturing defects. US-based customer service with responsive replacement parts fulfillment.
Full Specifications
| Feature | Value |
|---|---|
| Model Number | KHU100-33 |
| Series | Standart PRO |
| Overall Dimensions | 32.75" L × 19" W |
| Bowl Dimensions (Interior) | 30.5" L × 16.5" W |
| Bowl Depth | 10 inches |
| Steel Gauge | 16-gauge (approx. 1.6mm / 0.0625") |
| Steel Grade | T-304 Austenitic Stainless Steel (18/10 chromium/nickel) |
| Finish | Commercial Brushed Satin |
| Corner Radius | 10mm (R10) |
| Mounting Type | Undermount only |
| Minimum Cabinet Size | 36 inches |
| Drain Opening Diameter | 3.5 inches (standard) |
| Drain Position | Rear, off-center |
| Sound Dampening | NoiseDefend: rubber undercoating + pads (>80% coverage) |
| Anti-Condensation Coating | Non-toxic undercoating |
| Weight | ~29.5 lbs (13.4 kg) |
| Included Accessories | Bottom grid, basket strainer, mounting clips, hardware, cleaning cloth |
| Bottom Grid Material | Stainless steel, satin finish, rubberized feet |
| Basket Strainer Finish | Stainless steel (matches sink) |
| Garbage Disposal Compatibility | All standard 3.5" flange disposals |
| Countertop Compatibility | Granite, quartz, marble, solid surface, concrete, butcher block (with proper sealing) |
| Countertop Incompatibility | Laminate (without specialized rim support), tile |
| Warranty | Limited lifetime |
| Certifications | cUPC, ASME A112.19.3/CSA B45.4 |
| Country of Origin | Designed in USA, manufactured in China |
| Typical Price Range | $300–$400 USD |
Looking for the best balance of depth and durability? Check the latest price on the Kraus Standart PRO.
Technology Deep Dive: How the KHU100-33 Works
16-Gauge T-304 Stainless Steel: What the Numbers Mean
Steel gauge is a counterintuitive measurement: lower numbers indicate thicker material. The KHU100-33's 16-gauge rating means the stainless steel sheet used to form the basin is approximately 1.6 millimeters (0.0625 inches) thick. For context, 18-gauge—the most common grade in mid-range sinks—is roughly 1.2mm, making 16-gauge about 33% thicker. 20-gauge budget sinks drop to around 0.9mm. That thickness difference translates directly to three tangible benefits: dent resistance, vibration damping, and thermal stability.
T-304 (also called 18/8 or 18/10) refers to the alloy composition: 18% chromium, 8–10% nickel, with the balance primarily iron. The chromium forms a passive chromium oxide layer on the surface that self-heals when scratched, providing corrosion resistance. The nickel stabilizes the austenitic structure, making the steel non-magnetic, highly formable, and resistant to work hardening during the deep-draw manufacturing process. This is the same alloy used in commercial kitchen equipment, food processing, and medical instruments.
The basin is formed through a deep-draw stamping process where a flat sheet is progressively drawn into a die under high pressure. Because T-304 work-hardens, the forming process actually increases the steel's yield strength in the corners and walls—precisely where structural integrity matters most. The 10mm corner radius isn't just aesthetic; it's the minimum radius that allows uniform material distribution without thinning or micro-cracking during forming.
NoiseDefend Sound Dampening: Layer by Layer
Kraus's NoiseDefend system isn't a single pad—it's a multi-layer approach addressing different noise frequencies and transmission paths. The first layer is a thick, non-toxic rubberized undercoating spray-applied to the entire underside of the basin, covering the bottom and extending partway up the walls. This viscoelastic layer converts high-frequency vibration (the "ping" of a spoon hitting stainless) into low-grade heat through internal friction.
Over this coating, dense EVA (ethylene-vinyl acetate) sound-absorbing pads are adhered to the flat bottom and lower sidewalls, covering more than 80% of the total underside surface area. These pads target mid-frequency resonance—the "gong" effect when the basin acts as a sounding board. The pads are die-cut to fit the basin's contours precisely, with no gaps that would create drum-head effects.
The third element is the anti-condensation coating, a separate formulation applied over the sound pads. In humid climates or during heavy cold-water use, the temperature differential between the basin interior and the cabinet interior can cause condensation to form on the sink's exterior. This coating raises the surface temperature slightly and provides a vapor barrier, preventing moisture from dripping onto cabinet floors or promoting mold growth.
The combined effect is measurable: independent testing shows a 10–15 dB reduction in peak sound pressure level compared to an undamped 18-gauge sink of similar size. Subjectively, the difference is the distinction between a sharp metallic clang and a dull, muted thud when dropping a stainless steel pot.
Basin Geometry and Drainage Engineering
The KHU100-33's basin floor isn't flat—it's engineered with subtle compound slopes (approximately 1.5–2° toward the rear, with a slight cross-slope toward the center drain line). These slopes are formed during the deep-draw process, not machined afterward, preserving the steel's structural integrity and corrosion-resistant passive layer.
The rear-set, off-center drain position (approximately 4 inches from the rear wall, centered left-to-right) serves three purposes. First, it places the drain plumbing against the rear cabinet wall, maximizing usable under-sink storage width for garbage disposals, water filtration systems like the GE GXWH40L whole-house water filter guide, or pull-out organizers. Second, it aligns the drain with the natural fall line of the sloped floor, ensuring complete drainage without pooling. Third, it keeps the drain opening clear of the faucet's water stream, reducing splash-back and aerator fouling.
The 3.5-inch drain opening follows the ASME A112.18.2 standard, with a precision-machined flange seat that ensures a leak-free seal with the included basket strainer or any aftermarket disposal flange. The drain throat is flared slightly to accommodate the strainer locknut without stressing the surrounding steel.
Finish Science: Brushed Satin and the 10mm Radius
The "commercial brushed satin" finish is produced by passing the formed basin through a series of abrasive belts (typically 180–240 grit) in a single direction, creating a uniform linear grain. This directional finish serves a functional purpose: scratches from daily use—scouring pads, pot bottoms, utensils—tend to align with the existing grain, making them far less visible than on a random-orbital or mirror finish.
The 10mm (R10) corner radius is a deliberate engineering choice. Tighter radii (R6–R8) create a more "modern" square look but are significantly harder to clean—scrubbing tools can't reach the apex, and debris accumulates. Larger radii (R15+) waste usable bowl volume and create a dated appearance. R10 hits the sweet spot: a standard non-scratch sponge contacts the full corner radius, the geometry is easy to CNC-form consistently, and the aesthetic reads as contemporary without appearing severe.
Installation & Setup: Complete Walkthrough
Pre-Installation Planning
Before the sink arrives, verify three critical measurements. First, confirm your base cabinet interior width is at least 36 inches. Second, check countertop material compatibility: the KHU100-33 is designed for stone, solid surface, concrete, and properly sealed butcher block. Third, plan your faucet layout: because this is undermount, all faucet holes are drilled in the countertop, not the sink. For fixture recommendations, we suggest pairing this with a professional-grade tap like the Kohler Artifacts K-72759-VS or MOEN Chateau 7430 (check our MOEN Chateau 7430 buying guide for more options) or a more budget-friendly alternative like the Pfister Stellen LG529-STGS review (or see our full buying guide) to complete the look.
Tools and Materials Required
- Silicone sealant: 100% silicone, neutral-cure (GE Silicone II, Loctite PL Premium, or equivalent)
- Sink mounting clips: included, but verify quantity (typically 10–12 clips for this size)
- Adjustable wrench or basin wrench for drain connections
- Plumber's putty or silicone for basket strainer flange seal
- Level (24-inch minimum)
- Shims (plastic or composite, not wood)
- Sink harness or ratchet straps (highly recommended for 30-lb sink)
- Helper: undermount installation is a two-person job
- Denatured alcohol and clean rags for surface prep
- Painter's tape for masking countertop edges
Step-by-Step Installation Process
- Dry-fit and template verification: Place the sink upside down on the countertop, centered in the cutout. Verify the reveal (the gap between sink rim and countertop edge) is consistent—typically 1/8" to 3/16" for positive reveal, flush for zero reveal, or 1/8" overhang for negative reveal. Check that the drain opening aligns with your planned plumbing rough-in.
- Countertop prep: Clean the underside of the countertop around the cutout thoroughly with denatured alcohol. Any dust, stone slurry, or oil will compromise silicone adhesion. Mask the countertop edges with painter's tape to keep silicone off visible surfaces.
- Mounting clip installation: Attach the included mounting clips to the sink's rim using the provided screws. The clips have adjustable ears—set them so the clip's horizontal leg will sit flat against the countertop underside with the vertical leg against the sink rim. Do not fully tighten yet.
- Silicone application: Run a continuous 3/8" bead of 100% neutral-cure silicone around the entire sink rim, staying 1/8" back from the outer edge so it doesn't squeeze out into the reveal. For stone countertops, some installers prefer two parallel beads (inner and outer) for redundancy.
- Sink placement: With a helper (or sink harness), lift the sink into position. The 30-pound weight makes this the most critical step—control the descent to avoid shifting the silicone bead. Press the sink firmly into the silicone, ensuring even contact around the perimeter.
- Clip tightening: Working in a star pattern (alternating opposite sides), tighten the mounting clips against the countertop underside. Use a socket or wrench—don't overtighten, which can crack stone or distort the sink rim. The sink should feel solid with no movement when gently pushed.
- Shimming (if needed): If the countertop is slightly uneven, insert composite shims between the clip ears and countertop before final tightening. Never use wood shims—they compress over time and absorb moisture.
- Cleanup: Tool the silicone bead smooth with a finger or silicone tool, removing excess. Remove painter's tape immediately. Allow silicone to cure per manufacturer instructions (typically 24 hours for full strength) before running water.
- Drain assembly: Install the included basket strainer: roll a rope of plumber's putty (or apply a silicone bead) around the flange underside, insert through the drain opening from above, then from below install the rubber gasket, friction ring, and locknut. Tighten until the flange is snug against the basin—excess putty will squeeze out; wipe clean.
- Garbage disposal (if applicable): Follow the disposal manufacturer's instructions for mounting to the 3.5" flange. The KHU100-33's rear drain position typically provides ample clearance for disposal bodies, but verify before final clip tightening.
- Final inspection: Run water at full pressure, check for leaks at the strainer, disposal connection, and supply lines. Verify drainage is complete with no pooling. Place the bottom grid in the basin.
Common Installation Pitfalls and Solutions
Pitfall: Insufficient Cabinet Width
Many "36-inch" cabinets measure only 35.5" interior due to face frame overlap. Measure at the narrowest point. If under 36", you may need a smaller sink (Kraus offers 30" and 32" models) or cabinet modification.