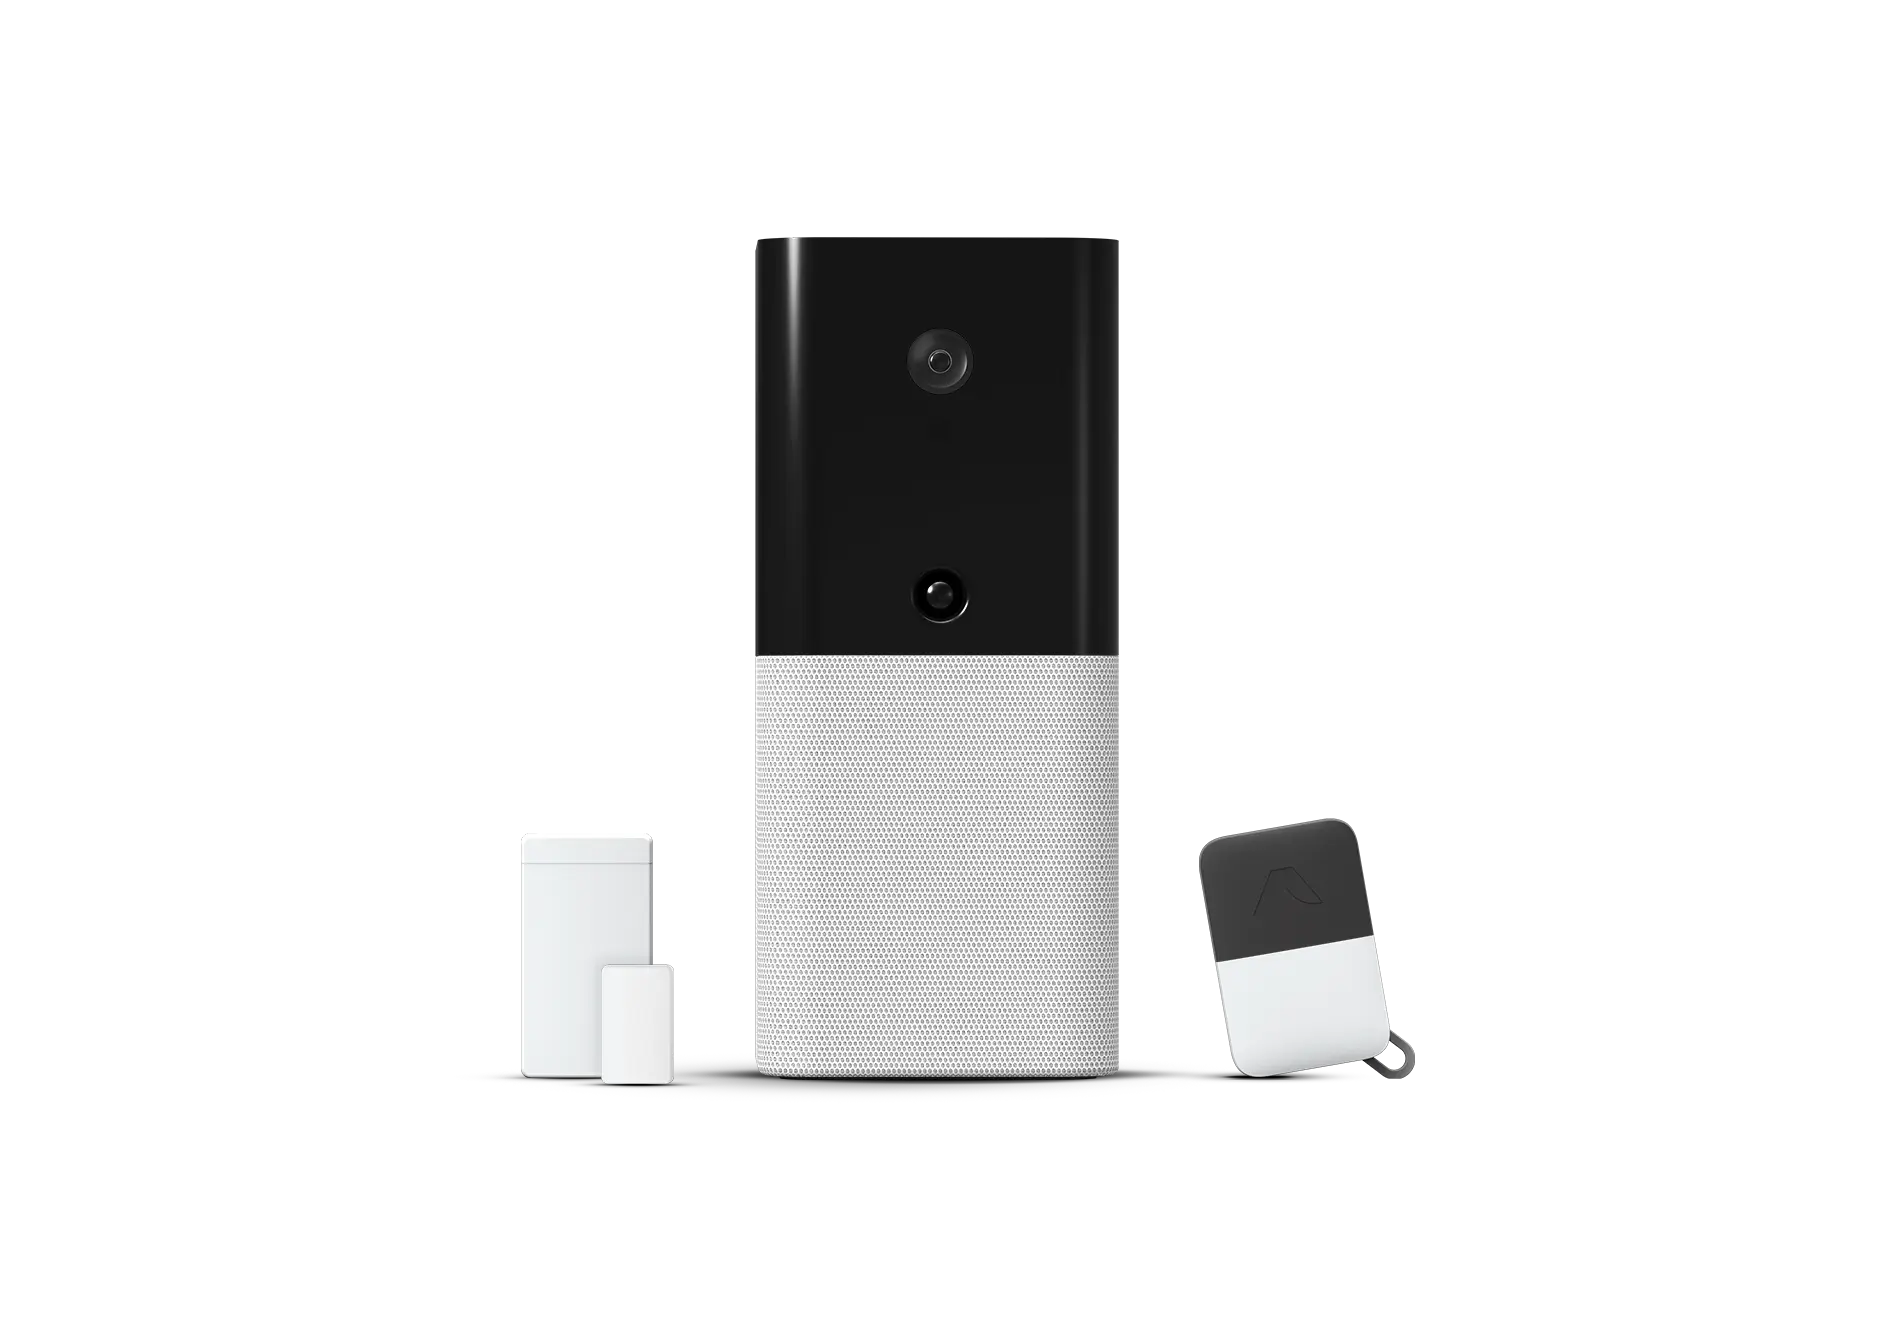
Finding a no-contract smart home security system that doesn't require a lifelong commitment or a chaotic array of hardware is a priority for many homeowners. For those seeking a balance between professional-grade protection and DIY flexibility, the Abode Smart Security Kit with iota All-in-One Security Hub offers a streamlined, no-contract smart home security solution and all-in-one hub that serves as a comprehensive entry point for homeowners. By consolidating critical hardware into a single hub, it eliminates the clutter typical of traditional alarm systems while opening the door to advanced home automation.
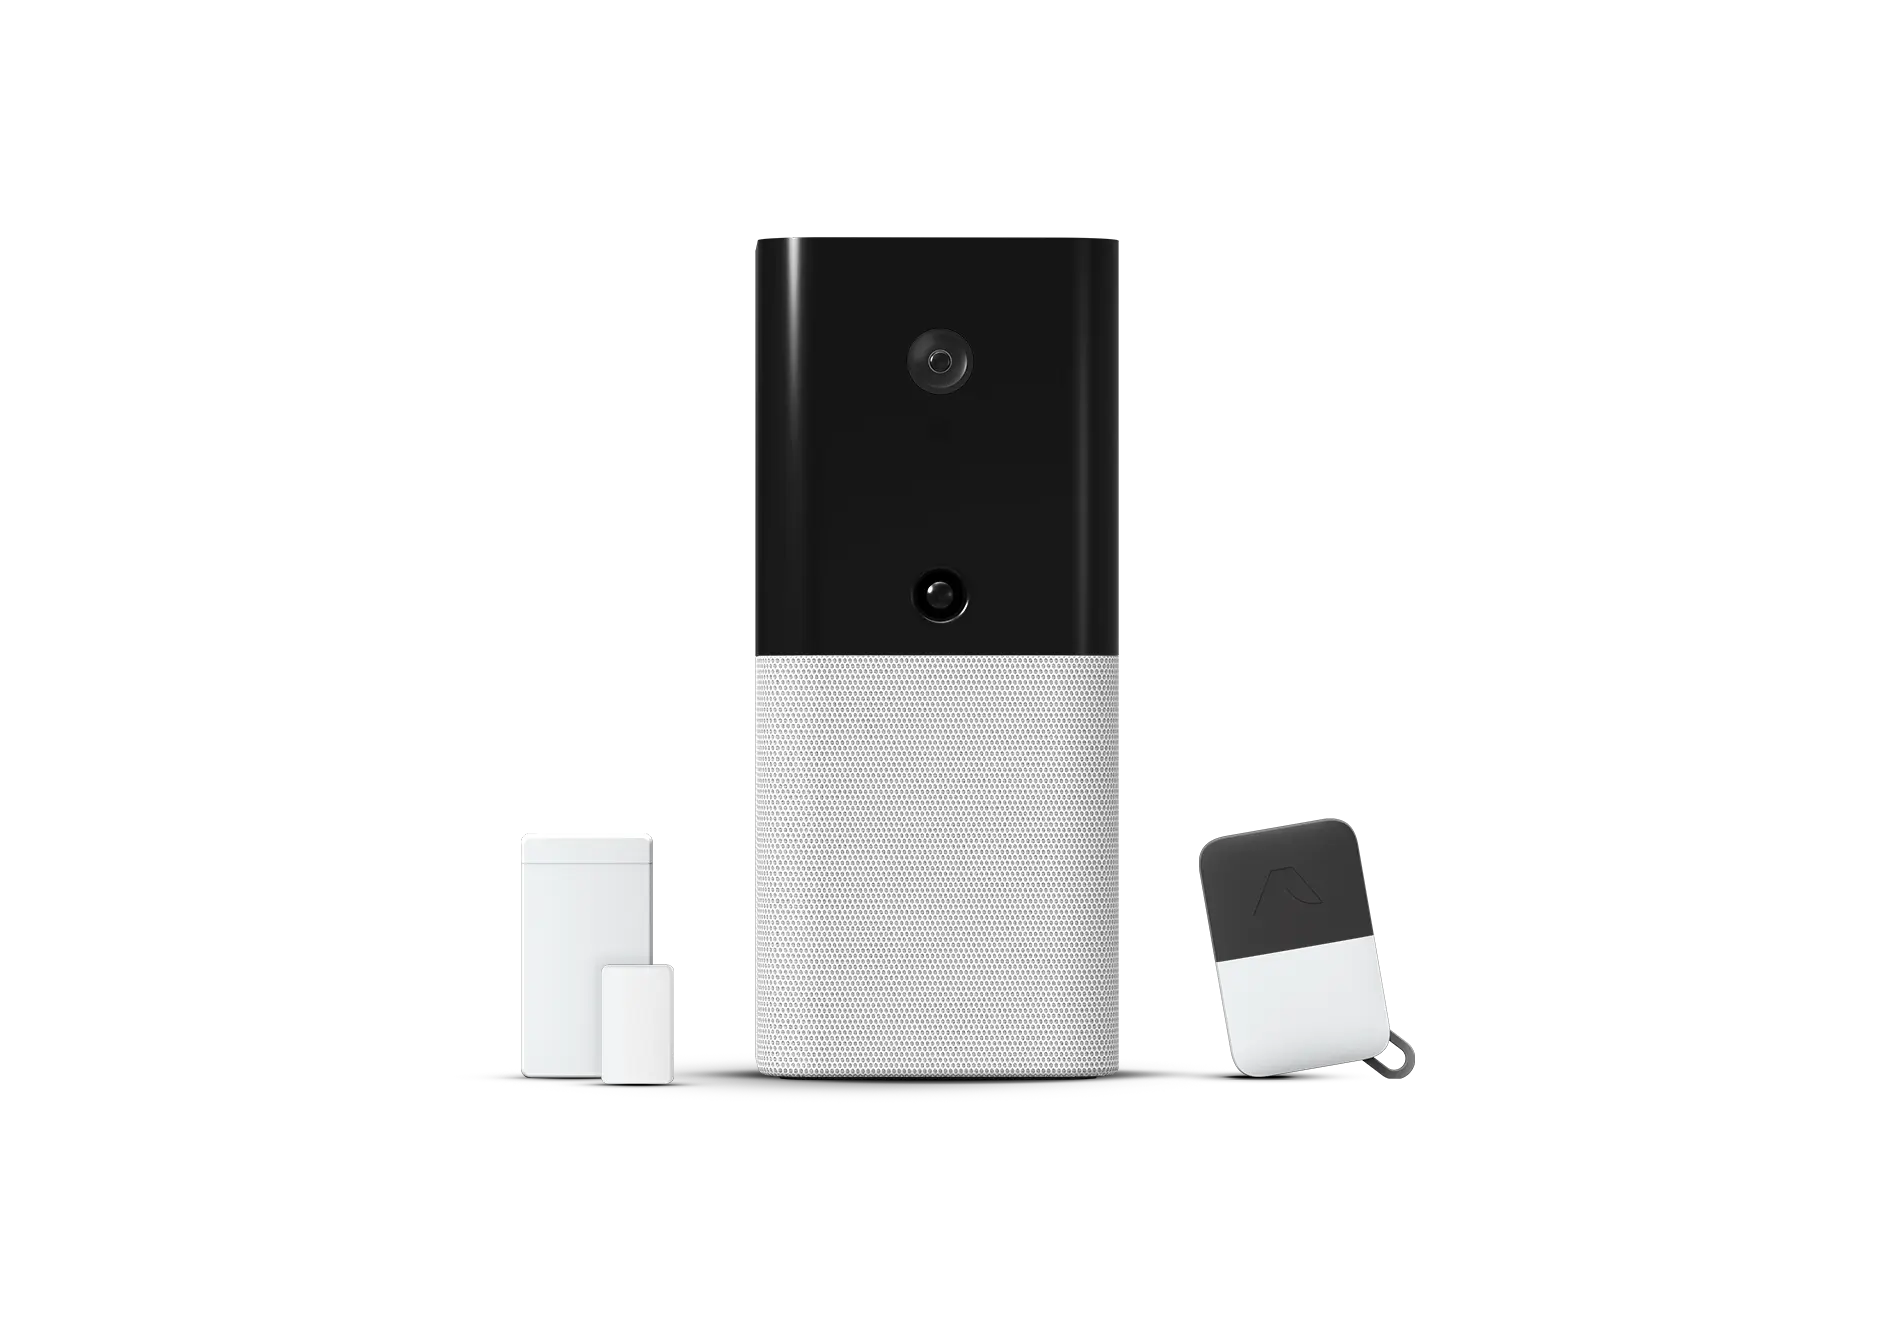
Best Overall Smart Security Starter
Abode Smart Security Kit with iota All-in-One Security Hub
Score: 9.0/10. A flexible, expandable smart security starter system with an all-in-one hub, broad smart home compatibility, and optional no-contract professional monitoring.
Abode Smart Security Kit with iota All-in-One Security Hub
The Abode Smart Security Kit with iota All-in-One Security Hub is engineered for the modern user who values versatility.
Related parts & accessories
Beyond the hub, the kit provides the essential "perimeter" protection through included door and window sensors. These sensors act as the first line of defense, triggering alarms or notifications the moment a breach is detected. Because the system is modular, the IOTA-KIT-1 isn't just a static starter pack; it is a platform. Users can start with this basic configuration and incrementally add an Abode Iota All-In-One Smart Security Kit, water leak sensors, or additional Abode Smart Security Kit with Home Automation Support sensors as their needs evolve or as they move into larger residences.
What truly separates the Abode iota from entry-level DIY kits is its deep integration capabilities. While many security systems operate in a "walled garden," Abode embraces the broader smart home landscape. By supporting Amazon Alexa, Google Assistant, Apple HomeKit, and Z-Wave, the iota hub transforms from a mere security alarm into a sophisticated home automation controller. This allows you to create complex "If This Then That" scenarios—such as turning on all smart lights if the security system is triggered at night—providing a layer of psychological deterrence that standalone alarms cannot offer.
Finally, Abode addresses the industry's most common pain point: the contract. Traditional security firms—such as those explored in our Vivint review or SimpliSafe review—often lock users into three-to-five-year agreements with steep cancellation fees. The Abode iota kit breaks this mold by offering professional monitoring on a flexible, no-contract basis (similar to the options found in our Eufy Security Alarm (S330) review). This month-to-month arrangement is a game-changer for renters who may move annually or homeowners who want to test the waters of professional monitoring before committing to a long-term expense.
Pros
- All-in-one iota hub combines a camera, motion sensor, and smart home controller
- Includes door and window sensors for a useful starter setup
- Expandable with additional Abode-compatible accessories
- Works with Alexa, Google Assistant, Apple HomeKit, and Z-Wave devices
- Optional professional monitoring without a long-term contract
Cons
- Starter kit coverage may need expansion for larger homes
- Professional monitoring is optional, so buyers should compare ongoing plan needs
- Best value comes if you will use its smart home integrations and expandability
| Specification | Abode Smart Security Kit with iota All-in-One Security Hub |
|---|---|
| Model number | IOTA-KIT-1 |
| Category | Home Security Systems |
| Hub type | iota All-in-One Security Hub |
| Integrated hub features | Security camera, motion sensor, and smart home controller |
| Included starter protection | Door and window sensors |
| Expansion | Compatible with additional Abode accessories |
| Smart home compatibility | Amazon Alexa, Google Assistant, Apple HomeKit, and Z-Wave devices |
| Monitoring | Optional professional monitoring available on a flexible, no-contract basis |
How the Abode iota System Works
Understanding the operational flow of the Abode iota system is essential for maximizing its utility. The system operates on a layered security architecture that begins with detection and ends with a choreographed response. The "brain" of the operation is the iota hub, which maintains a constant connection to your home network and the Abode cloud servers.
The Detection Layer
The process begins when a sensor is triggered. This could be a door/window sensor being opened (breaking a magnetic circuit) or the iota hub's integrated motion sensor detecting infrared heat signatures. Because the hub also features a built-in camera, it can provide visual verification of the event, allowing the homeowner to see exactly what triggered the alarm via a smartphone notification. This eliminates the "blind panic" associated with traditional alarms where you know something happened but not what happened.
The iota hub's camera uses advanced motion-detection algorithms to filter out pets and insignificant movement, reducing the number of false positives. When a valid event is detected, the camera captures a clip and uploads it to the secure cloud, ensuring that even if the hub is tampered with, the evidence of the intrusion is preserved.
The Processing Layer
Once a trigger is received, the hub processes the event based on the current "Mode" of the system. In 'Away' mode, any sensor trigger typically initiates a full alarm. In 'Home' mode, the system might only monitor perimeter sensors while ignoring the internal motion sensor to allow residents to move freely. This logic is handled locally on the hub but can be adjusted remotely via the Abode app.
The processing layer also handles "entry delays." For example, when the front door opens, the system doesn't scream immediately; it gives the user a pre-set window of time (e.g., 30 seconds) to disarm the system using the app or a keypad. If the code isn't entered, the system escalates to a full alarm state.
The Response Layer
Depending on the user's configuration, the response can take several forms. For self-monitored users, the app sends an immediate push notification. For those with professional monitoring, the signal is routed to a central monitoring station where a dispatcher verifies the alarm and contacts the homeowner or emergency services. Simultaneously, the Z-Wave integration can trigger "Action" events, such as locking all Abode smart locks or flashing smart bulbs.
Related parts & accessories
Deep Dive: Buyer's Guide for Home Security Hubs
Choosing a security hub is less about the initial hardware and more about the ecosystem you are building. When evaluating the Abode iota against other options, there are four critical pillars to consider: Protocol, Scalability, Monitoring, and Integration.
1. Communication Protocols: Why Z-Wave Matters
The iota hub uses a mix of Wi-Fi for cloud connectivity and Z-Wave for device communication. Z-Wave is a gold standard in home automation because it creates a "mesh network," meaning each powered device acts as a repeater, extending the range of the system. This prevents the "dead zone" issues common with purely Wi-Fi-based sensors. If you plan to have sensors in a detached garage or a far-off bedroom, a Z-Wave compatible hub like the Abode iota (or Ring Alarm Pro 14-Piece Kit) is vastly superior to budget Wi-Fi kits. For those needing maximum coverage, we recommend comparing these options in our SimpliSafe (SS3-13PKGCAM) Review.
Unlike Wi-Fi, which can congest your router and slow down your internet, Z-Wave operates on a different frequency. This means adding 20 more sensors to your Abode system won't impact your Netflix streaming quality. Furthermore, Z-Wave devices are designed for extreme battery efficiency, allowing sensors to last for years without a battery swap.
2. The Scalability Curve: From Starter to Fortress
A common mistake for new buyers is purchasing a "complete" kit that doesn't actually fit their floor plan. The IOTA-KIT-1 is designed as a "Seed Kit," similar in philosophy to the SimpliSafe 12-Piece Wireless Home Security System (or the SimpliSafe review). For a more expansive starting point, see the Ring Alarm Pro 14-Piece Kit for a more comprehensive setup. If you're considering a more robust setup, you might also look at the SimpliSafe 13-Piece Wireless Home Security System. It provides the essential hub and a few sensors. The value here is the ability to scale. You can add specialized sensors—such as the Abode Iota All-in-One Home Security Kit accessories—without having to replace the core hub.
Compatible Expansion Accessories
When budgeting, consider the following expansion path:
- Phase 1 (Starter): Hub and primary entry points (Front door, back door).
- Phase 2 (Perimeter): First-floor windows and sliding glass doors.
- Phase 3 (Environmental): Water leak sensors near the water heater (or paired with a Basement Watchdog sump pump system for total basement protection) and smoke detectors in the hallway.
- Phase 4 (Automation): Smart locks and switches to create automated "Leaving Home" scenes.
3. Monitoring Philosophy: Flexibility vs. Commitment
There are three main types of monitoring: Self-Monitored, Professional Monitoring, and Hybrid. The Abode iota supports all three. The flexibility of the no-contract plan is a strategic advantage, especially when compared to Traditional setups like the ADT Self Setup 9-Piece Home Security Kit often require more rigid commitment. or the Eufy Security Alarm (S330) review or the Cove Home Security System Deluxe Package. It allows you to scale your security spend based on your current risk—for example, paying for professional monitoring only while you are traveling for a month.
Self-monitoring is great for those who are always connected and don't mind being the primary dispatcher. However, professional monitoring provides peace of mind when you are in a dead zone or asleep. Abode's model allows you to switch between these states via the app, removing the dread of a 36-month contract.
4. Ecosystem Integration: Breaking the Walled Garden
The "smart" part of smart security is the ability to make devices talk to each other. Because the iota hub supports Apple HomeKit, it is one of the few professional-grade security systems that integrates natively with Siri and the Home app. For those deep in the Google or Amazon ecosystems, the voice control integration allows for seamless arming/disproving (with a secure PIN) and quick checks of the integrated camera feed.
This integration extends to Z-Wave devices from other manufacturers. If you already own Z-Wave smart plugs or lights, you can often bring them into the Abode ecosystem, turning your security hub into a full-blown smart home controller.
Installation and Setup Guide
The IOTA-KIT-1 is designed for DIY installation, meaning no drilling into walls or running wires through attics. Here is the step-by-step process for a successful deployment.
Step 1: Hub Placement
The iota hub's placement is critical because it serves as both the brain and a security camera. Position the hub in a central location with a clear view of a high-traffic area (like a hallway or living room). Ensure it is within reach of a power outlet and has a stable Wi-Fi signal. Avoid placing it directly behind a metal object or inside a cabinet, as this can interfere with the Z-Wave and Wi-Fi antennas.
Consider the camera's field of view. You want to see the entrance, but you also want to avoid pointing it directly at a window where sunlight could cause glare and trigger false motion alerts. A shelf or a small side table at eye level is usually the ideal spot.
Step 2: App Configuration
Download the Abode app and create an account. The app will guide you through the "Onboarding" process, where you will connect the hub to your Wi-Fi network. We recommend using a dedicated 2.4GHz band if your router separates frequencies, as this generally provides better range for smart home devices.
During this phase, you will set up your "Master Code." This is the primary password used to disarm the system. Choose something secure but memorable, as you will likely be typing this into your phone or a keypad multiple times a day.
Step 3: Sensor Deployment
Use the provided adhesive backing to attach the door and window sensors. The sensor consists of two parts: the main body and the magnet. The magnet must be placed on the moving part (the door or window) so that when the door opens, the gap between the sensor and the magnet exceeds the trigger threshold (usually about 0.75 inches).
For doors, place the sensor on the frame and the magnet on the door itself. Ensure they are aligned horizontally or vertically. Test each sensor by opening the door and checking the app to ensure it registers the "Open" state instantly. If there is a delay, move the hub slightly closer or check for interference.<